Choosing the right Ball Nosed Cylinder Burr is less about buying the most aggressive cutter. It is about matching shape, material, and control to the work in your hands. A rounded nose can reach curved surfaces, blend welds, and smooth narrow transitions. However, the wrong diameter may remove too much metal or leave deep marks.
Experienced toolmaker Michael J. Wright explains, “A burr should follow the shape of the work, not fight it.” That principle matters when selecting a carbide burr for steel, stainless steel, aluminum, or softer alloys. Material hardness changes cutting behavior. Flute design matters too. A single-cut burr can provide controlled shaping, while a double-cut version often produces faster stock removal and a rougher working feel.
Start with the workpiece. Picture a small fillet inside a casting. A compact Ball Nosed Cylinder Burr may reach it cleanly, while a large head could strike nearby edges. Check the shank size, grinder compatibility, recommended speed, and burr coating. Keep the tool moving. Staying in one spot can create heat, chatter, or an uneven pocket.
Small details matter.
I have seen users choose by appearance alone. That shortcut often fails. The “best” burr is not always the sharpest one. It is the one that gives predictable contact and manageable control. This guide examines cutting profiles, tooth patterns, dimensions, operating habits, and common selection mistakes. Some recommendations will depend on experience, and that is worth admitting. No chart can replace testing the burr gently on a scrap piece first.
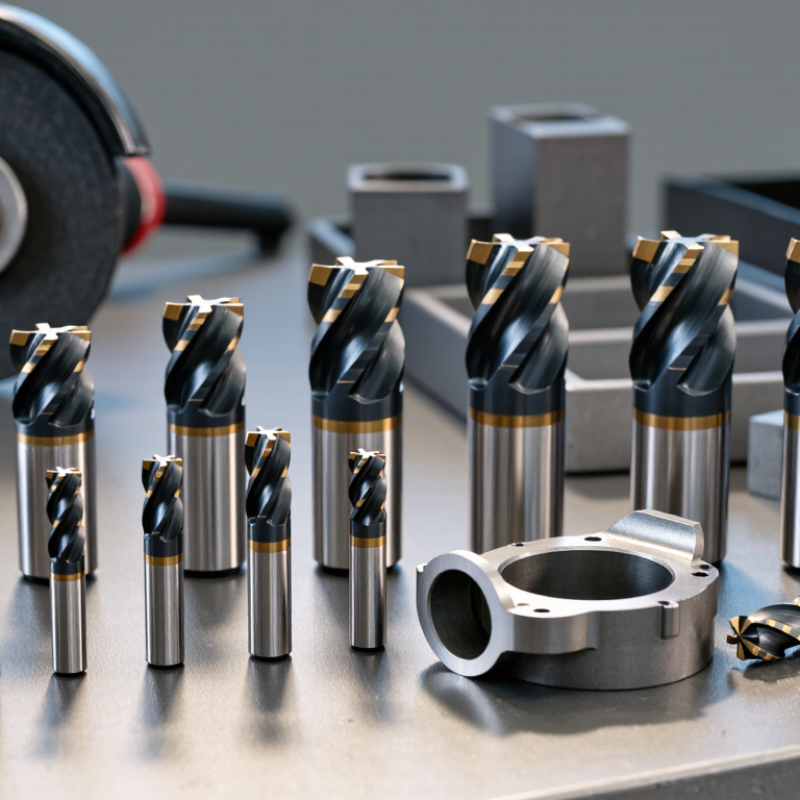
A ball nosed cylinder burr combines a straight cylindrical body with a rounded cutting end. This design reaches flat surfaces, curved edges, internal corners, and shallow grooves with fewer tool changes. The cylindrical section removes material efficiently, while the ball nose reduces sharp transitions on curved profiles. Carbide versions are commonly selected for steel, stainless steel, cast iron, and aluminum.
Grand View Research’s 2024 metal cutting tools analysis identifies carbide tooling as a major growth segment, supported by demand for longer tool life and higher machining productivity.
Flute geometry controls the burr’s behavior. Coarse flutes remove material quickly, but they may leave deeper marks on softer metals. Fine flutes provide smoother control during deburring and detail work.
A machinist should also match the burr diameter to the work area. A 6 mm head offers stability on broad edges, while a 3 mm head can enter tighter recesses.
The U.S. Occupational Safety and Health Administration stresses secure workholding, eye protection, and controlled tool handling during abrasive operations.
A common mistake is choosing the smallest burr for every detail. Small heads can flex, heat quickly, and wear unevenly.
In practice, I check the material, access angle, flute style, and required surface finish before selecting the shape. My first choice is not always perfect. Testing on scrap metal often reveals chatter, clogging, or excessive heat before production begins.
Matching burr material to the workpiece matters more than selecting a familiar profile. Tungsten carbide suits hardened steel, cast iron, and stainless steel. It keeps its cutting stiffness under heat.
The USGS Mineral Commodity Summaries 2024 estimated 2023 global tungsten mine production at about 81,000 metric tons. That figure makes carbide feel valuable, not disposable. Use light pressure and stable speed. Otherwise, chipped edges can scar a curved pocket.
For aluminum and mild steel, sharp carbide teeth remove stock quickly. However, chip loading becomes the real problem. A coarse cut and suitable aluminum lubricant can reduce clogging. Test on scrap first.
High-speed steel may feel more forgiving during interrupted handwork, although it usually loses hardness sooner. Diamond-coated burrs are often better for glass, ceramics, and hardened coatings.
The International Aluminium Institute reports that recycled aluminum uses about 95% less energy than primary aluminum. Clean separation matters.
Match the burr diameter to access. Match the nose radius to the internal curve. A 6 mm burr is not automatically safer than a 3 mm burr. Check runout, shank grip, and the stated speed range before contact.
Operators often blame the burr material first. Vibration is frequently the hidden cause.
My own correction was simple: I once selected hardness before considering chip evacuation. It looked logical. It performed poorly. Material matching requires testing, not assumptions.
Choosing a ball nosed cylinder burr starts with the workpiece, not the tool drawer.
For narrow slots and small radii, use a smaller diameter, typically 3–6 mm. It follows curved walls more accurately and reduces accidental gouging.
For broad surfaces, an 8–12 mm burr removes material faster and leaves fewer overlapping marks. Check the shank size, too. A mismatched collet can increase runout and vibration.
The cutting profile matters just as much. A double-cut burr creates shorter chips and offers better control on steel, cast iron, and other tough metals. A single-cut profile can clear material quickly, but it demands steadier hand pressure.
For aluminum, choose a chip-breaking geometry or a suitable non-ferrous profile; otherwise, soft chips may pack between the flutes. ISO 7755-1:2013 provides standardized terminology and dimensional guidance for rotary files, so compare the supplier’s stated dimensions with the actual application. Do not select by diameter alone.
Safety data supports a conservative choice.
The U.S. Bureau of Labor Statistics reported about 2.6 million nonfatal workplace injuries and illnesses in private industry during 2023. Burr selection cannot prevent every injury, but lower vibration and controlled feed pressure help reduce exposure.
I still sometimes choose a smaller burr for visibility, then discover it cuts too slowly. That is a useful warning. Test on scrap first, inspect the edge after ten seconds, and adjust the profile before continuing.
Choosing a ball nosed cylinder burr starts with the shank, not the cutting head. Measure the shank diameter carefully. It must match the tool’s collet or chuck size. Even a small mismatch can create vibration, poor control, and uneven wear. I have seen operators tighten a loose collet too much. That usually makes the problem worse.
Check the collet condition before installation. Its gripping surfaces should be clean, dry, and free from burrs. Keep the burr seated deeply, but do not force the flutes into the collet. A short, exposed length improves rigidity. Excessive extension acts like a flexible rod. That assumption can fail quickly at higher speeds. Runout is another concern. If the burr wobbles visibly, stop and inspect the setup.
Operating conditions also determine the right burr. Match the recommended speed to the burr diameter, material, and tool power. Smaller heads often tolerate higher speeds, while larger heads need more control. Apply light, steady pressure instead of pushing aggressively. Heavy pressure generates heat and can load the cutting edges. Short passes help when working on hard metal or narrow surfaces. For softer materials, clogged flutes may require cleaning and a slower feed. Personal experience suggests that “faster” often feels productive, but it can reduce accuracy. Always test on a small area first, then adjust speed, pressure, and extension length based on the actual cutting response.
Choosing a ball nosed cylinder burr starts with the workpiece and machine. Match the burr’s diameter, nose radius, cut style, and shank size to the job. A smaller burr offers better access, but it may wear faster under heavy pressure. Check the rated speed before installation. Never assume that a larger burr is automatically safer.
Inspect the tool under bright light before every test. Look for chipped teeth, bent shanks, rust, or uneven wear. Secure the workpiece firmly, then keep bystanders outside the danger area. Wear suitable eye protection and hearing protection. Avoid loose clothing, jewelry, and anything that could catch. Run the burr at the recommended speed without touching the material. Stop immediately if it wobbles, vibrates, or produces an unusual sound.
Test on scrap material first. Use light pressure and short contact periods. Let the burr cut instead of forcing it. Forcing creates heat and can damage both the tool and workpiece. I still recheck the shank after a careful setup; small movement can develop quickly. No inspection routine is perfect. That matters.
After use, remove debris with a proper brush or approved cleaning method. Do not strike the cutting edges against a bench. Dry the burr completely and store it in a protected holder. Record excessive wear when possible. Replace the tool when its shape, balance, or cutting action changes noticeably. A clean burr is easier to inspect next time.
Use a 3–6 mm burr for narrow slots and small radii. Choose 8–12 mm for broad surfaces and faster material removal. Smaller is not always better; I sometimes sacrifice speed for visibility.
A double-cut profile creates shorter chips and steadier control on hard metals. A single-cut profile removes material quickly but needs consistent hand pressure. It can punish a rushed grip.
Use chip-breaking geometry or a profile designed for non-ferrous materials. Soft chips can pack between flutes and stop clean cutting. Check the flutes often.
Measure the shank and match it precisely to the collet or chuck. A mismatch can cause vibration, uneven wear, and poor control. Do not rely on tightening force.
Keep the collet clean, dry, and free of burrs. Seat the shank deeply without placing flutes inside the collet. Keep the exposed length short for better rigidity.
Match speed to diameter, material, and tool power. Use light, steady pressure and short passes, especially on hard metal. Aggressive pushing creates heat.
Stop if the burr visibly wobbles during rotation. Inspect the shank, collet, and seating depth before continuing. Wobble is not a minor detail.
Test it on scrap or a small hidden area first. Inspect the edge after about ten seconds, then adjust speed, pressure, or extension. My first setting is not always correct.
Choosing the right Ball Nosed Cylinder Burr begins with understanding its rounded end and cylindrical profile, which allow smooth material removal, contouring, blending, and work in recessed or curved areas. The ideal burr depends on the workpiece: harder materials may require a more wear-resistant construction, while softer materials can benefit from a profile that reduces clogging and provides controlled cutting. Burr diameter, tooth pattern, and cutting aggressiveness should be selected according to the required finish, accessible space, and amount of material to remove.
Before use, confirm that the shank matches the tool and that the equipment can operate within the burr’s recommended speed range. Secure the workpiece, wear suitable protective equipment, and begin with light, controlled passes to evaluate cutting performance. Avoid excessive pressure, overheating, or sudden side loading. Regularly inspect the burr for wear, clean it after use, and replace it when its cutting edges or structural condition no longer support safe, consistent performance.

N&D Carbide